
Puzzling Places - Getting Started with Puzzle Maker - Documentation

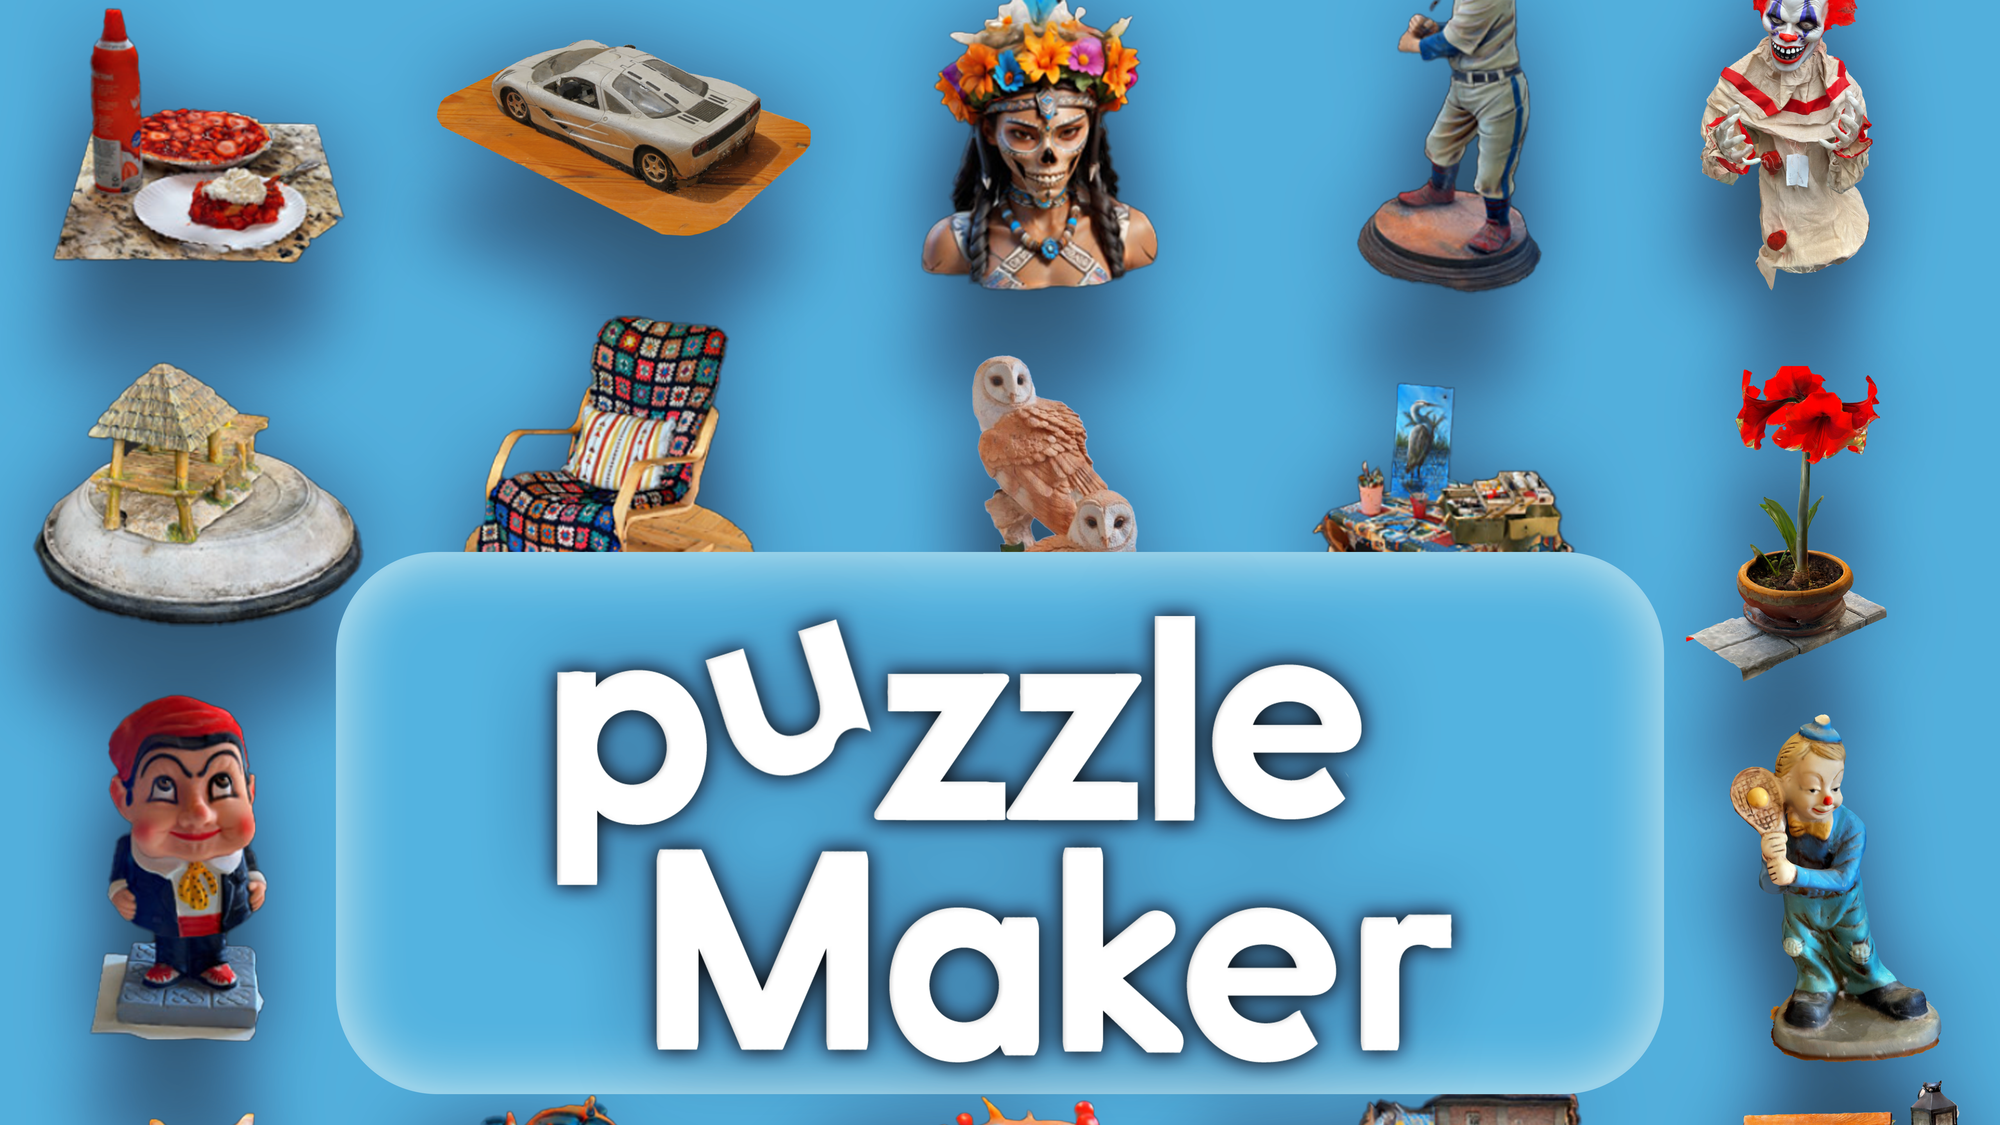
Here you will find documentation for Puzzling places puzzle maker. You will learn how to make your own 2D and 3D puzzles and how to play community made puzzles on steam.
In order to start with Puzzlemaker, you will need the game Puzzling Places on Steam, and the Puzzle Maker Tool and Portable Blender DLC installed and fully updated.
Contents:
- Video Walkthrough
- Downloading PuzzleMaker
- Installing Portable Blender
- Making a 3D Puzzle
- Making a 2D Puzzle
- Publishing to Steam Workshop
- Playing your Puzzle
- Playing Puzzles from Steam Workshop
- Tips, Tricks & Questions
-Further Documentation & Advanced Tools
Getting Started: Walkthrough Video
Getting Started
You will need:
- A mobile phone
- A PC or Laptop with Steam and Puzzling Places - 3D Jigsaw Sim Installed
In this tutorial, we will show you how to use the ‘Scaniverse’ app (available on iOS and Android) to make your first scan and 3D Puzzle, and how to use images to make a 2D Puzzle.
Downloading Puzzlemaker
Puzzle Maker comes with Puzzling Places and is accessible to anyone who owns the game through the Steam client. To download Puzzle Maker, open your Steam Library:
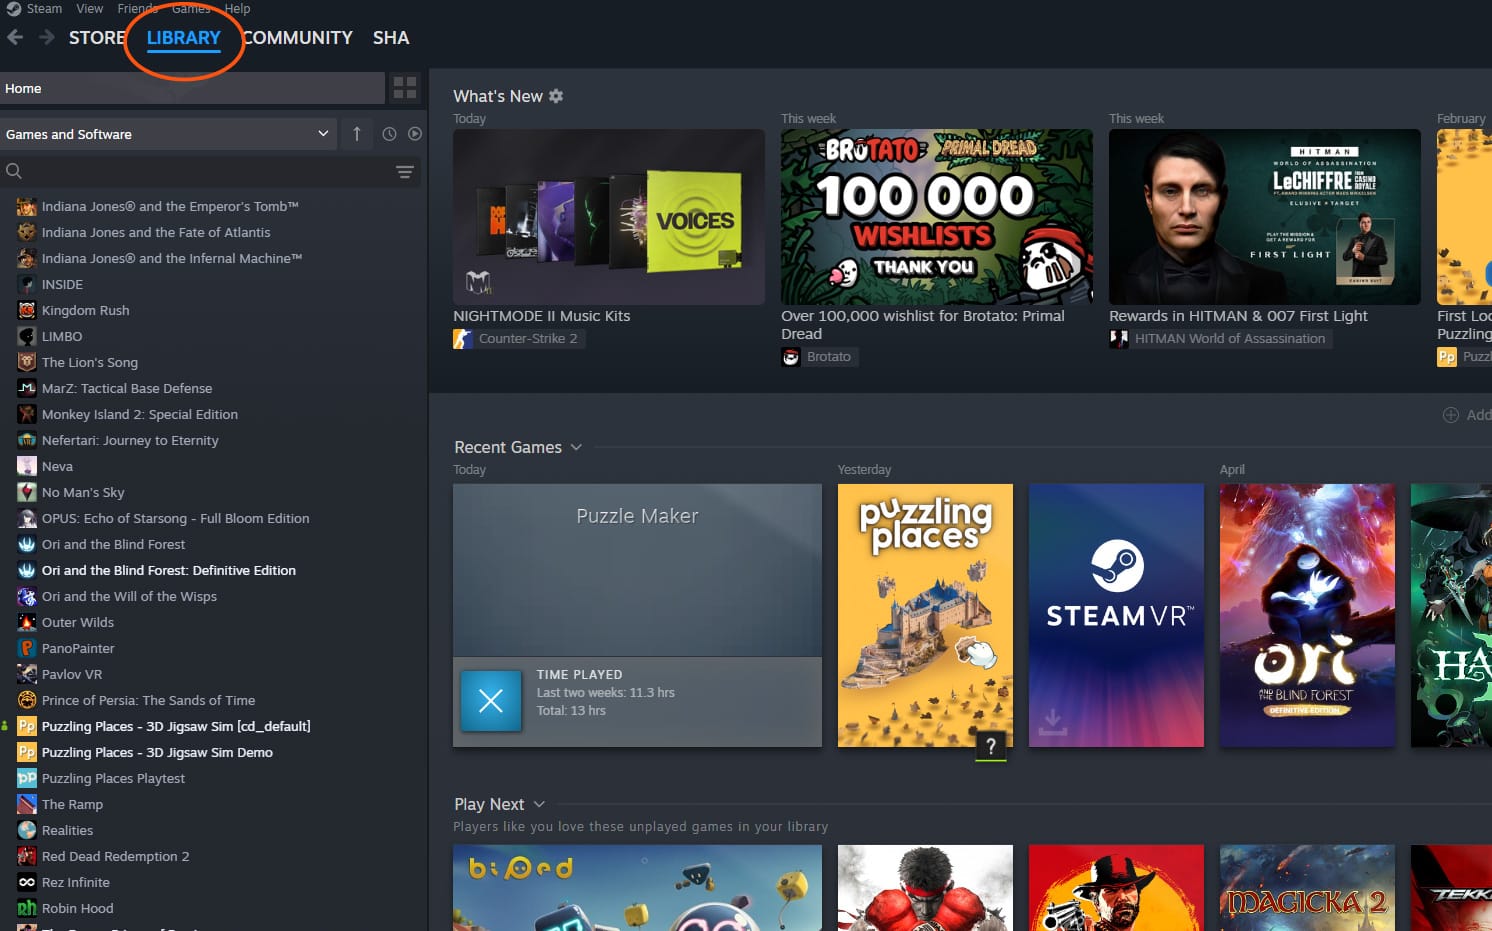
If you don’t see Puzzle Maker listed there, it’s because Puzzle Maker is a tool, and tools are hidden by default. Click the Games and Software drop-down:
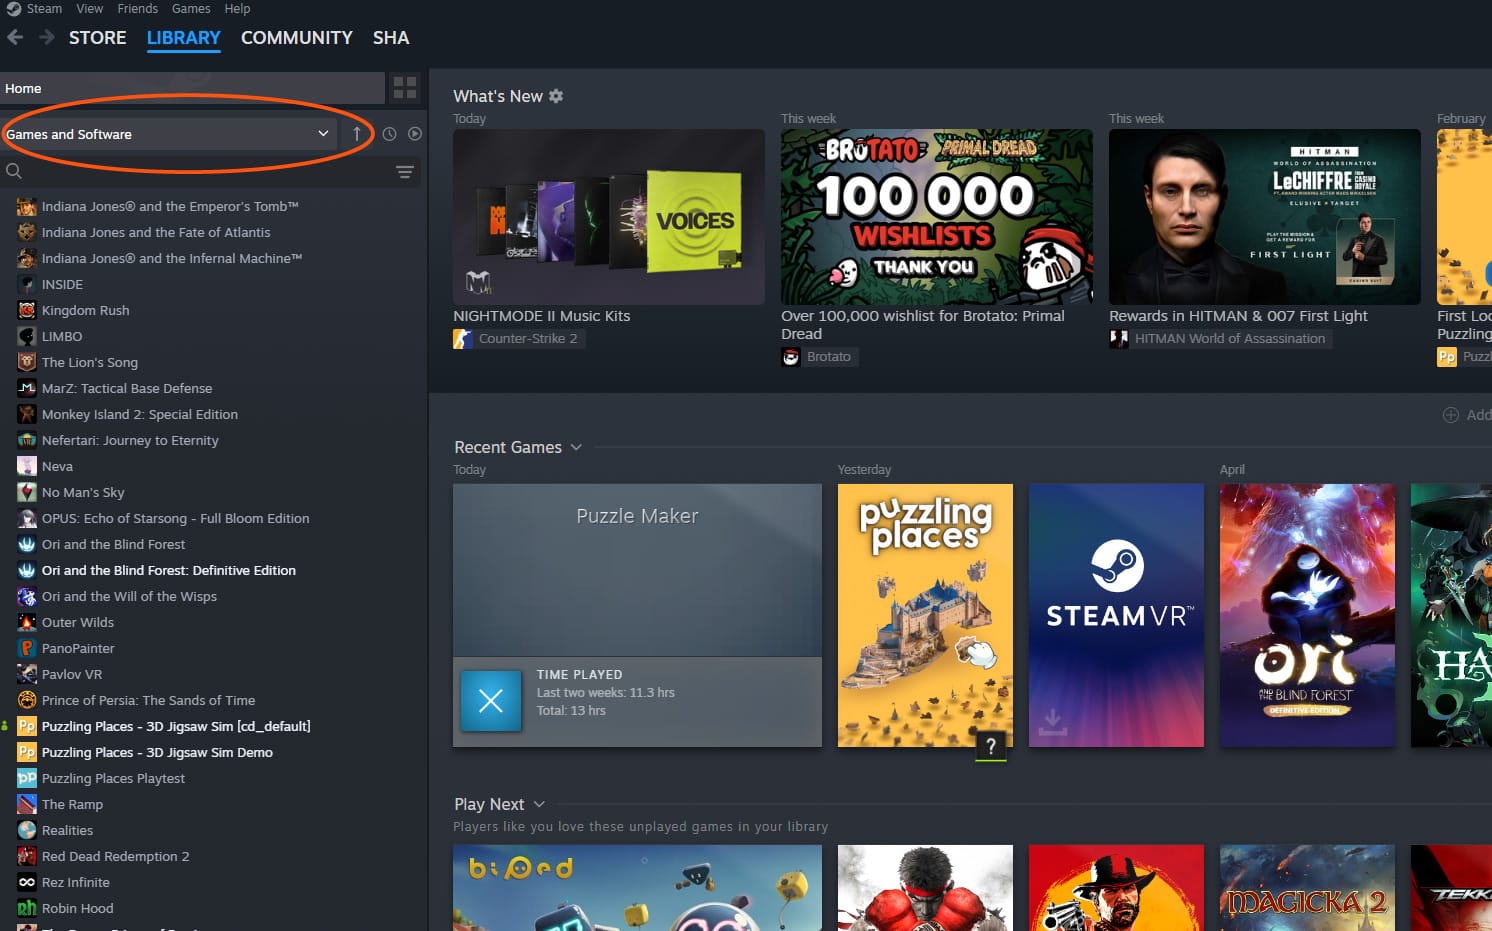
And enable Tools in the drop-down:
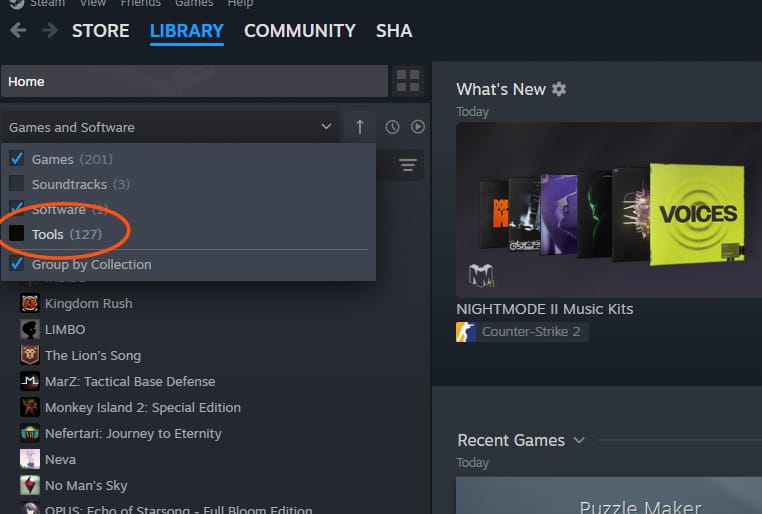
Puzzle Maker will now appear in the list. If you have a lot of items, you can also search for Puzzle Maker.
Installing Portable Blender
In order to run Puzzle Maker, you will need to install portable blender from steam. You can find it from the game's steam page under 'Content for this game', or from the link below:
Once you have installed this, you will be prompted to update Puzzling Places - 3D Jigsaw Sim on Steam.
Making a 3D puzzle
Scanning with Scaniverse
In this section, we will walk through how to scan your subject in 3D with Scaniverse.
First, open the Scaniverse app. From the home screen, tap the red ‘+’ button in the centre to start a new scan, then select ‘Mesh’ from the pop-up menu. In the next menu, choose the size of the object you will be scanning (Small, Medium, or Large).
Point the camera at the object you want to scan and press the Record button to begin. Once recording starts, slowly move around the object in multiple passes, capturing it from all sides and angles, including low and high viewpoints. As you scan, the red stripes will clear from the screen, showing that a certain area has been fully scanned. Move steadily and deliberately to ensure good coverage. When you’re done, press ‘Stop’ to finish the scan. Next you will be asked to choose the processing mode. In this case, select ‘Detailed’ (Photogrammetry).
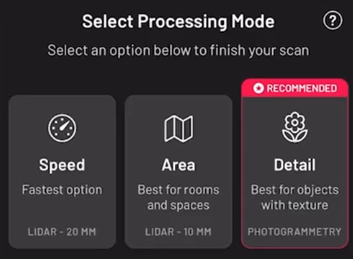
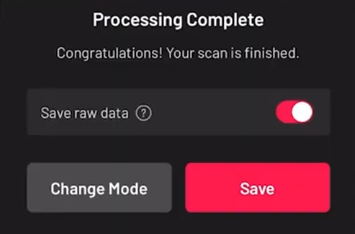
The scan will now begin Processing. This may take several minutes. Once processing has finished, you will se a preview of your model. Click ‘Save & Close’ if you are happy with the scan, or ‘Delete’ (In the top right) if you would like to try again.
Exporting your Scan
Once you have a scan you are happy with, you can now export it!
To export your scan, open it in the Scaniverse app and click ‘Share’ then ‘Export Model’, and click ‘OBJ’.
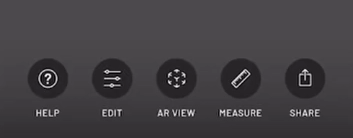
From here you can choose how to save your scan to your computer - either save it to your device and copy it using a USB cable, or share to your Google Drive (or similar) and download it.
Adding your scan to Puzzlemaker
Once you have exported a scan, it’s time to add it to puzzlemaker!
Launch the Puzzlemaker app on your computer and click ‘New Puzzle’.
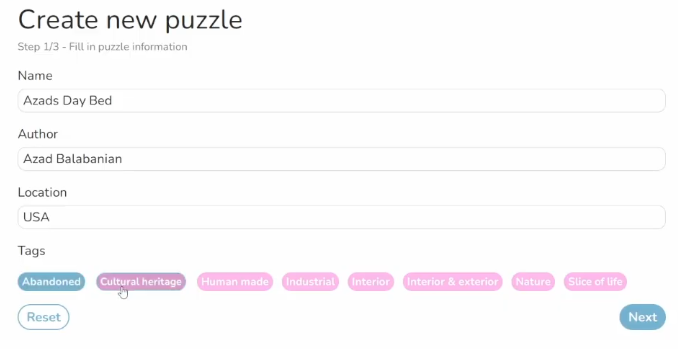
You will need to add some basic puzzle information. Add a name for your puzzle, an Author name, your Puzzle location, and select a few appropriate tags, and click ‘Next’.
On this screen you will need to add the .OBJ file from your scan. First make sure '3D' is selected, then either click and drag the file into Puzzlemaker, or click ‘Browse Files’ to locate your scan.
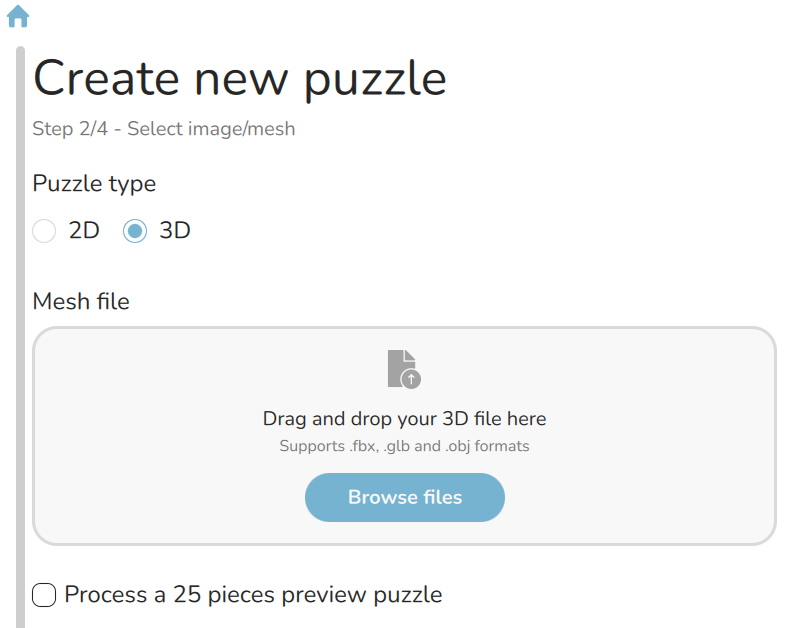
You can then scroll down to view more options such as adding your own puzzle soundscape or background colours.
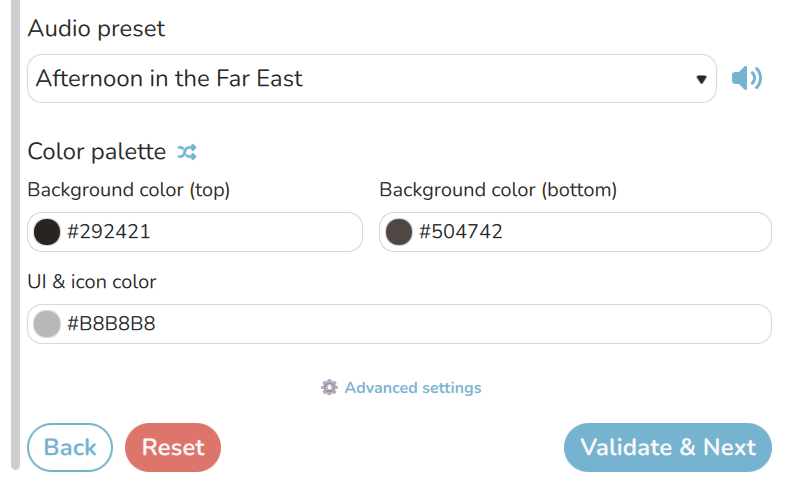
Once you are ready, click 'confirm and validate'. Once your puzzle is validated, click ‘Next’. Confirm everything is OK on the next screen, then click ‘Confirm & Launch’ to begin making your puzzle. Please note that this can take a long time.
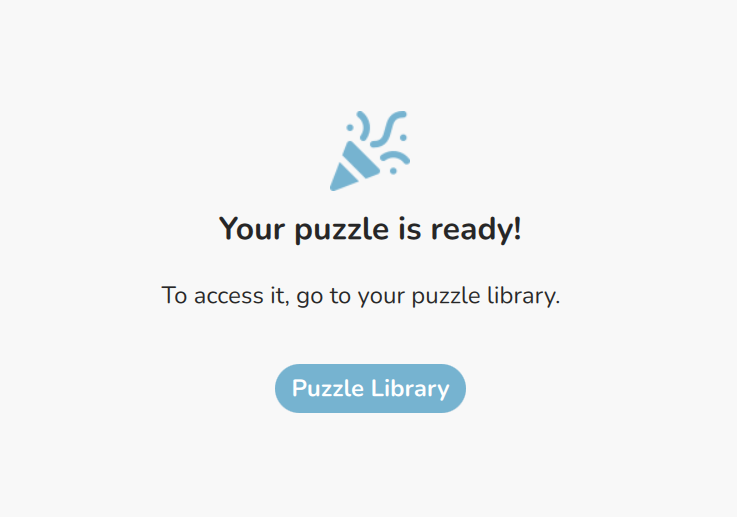
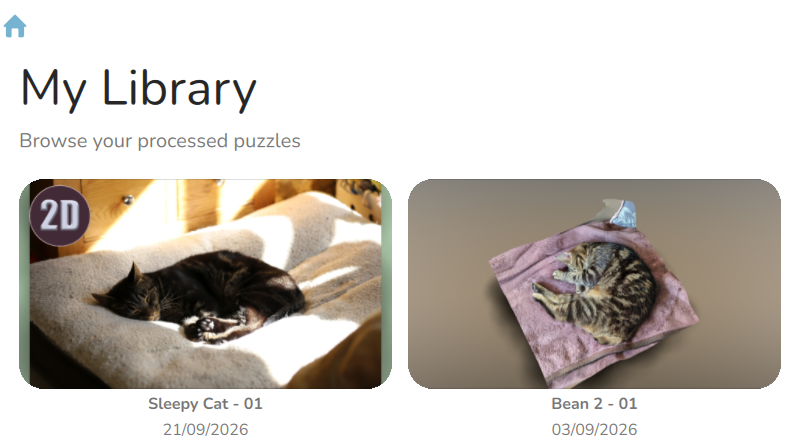
Once your puzzle has finished processing, click ‘Puzzle Library’ to see your
Making a 2D Puzzle
Making a 2D puzzle is similar to making a 3D puzzle, but you don't need a scan just a 2d image or Photo!
Importing your image to puzzlemaker
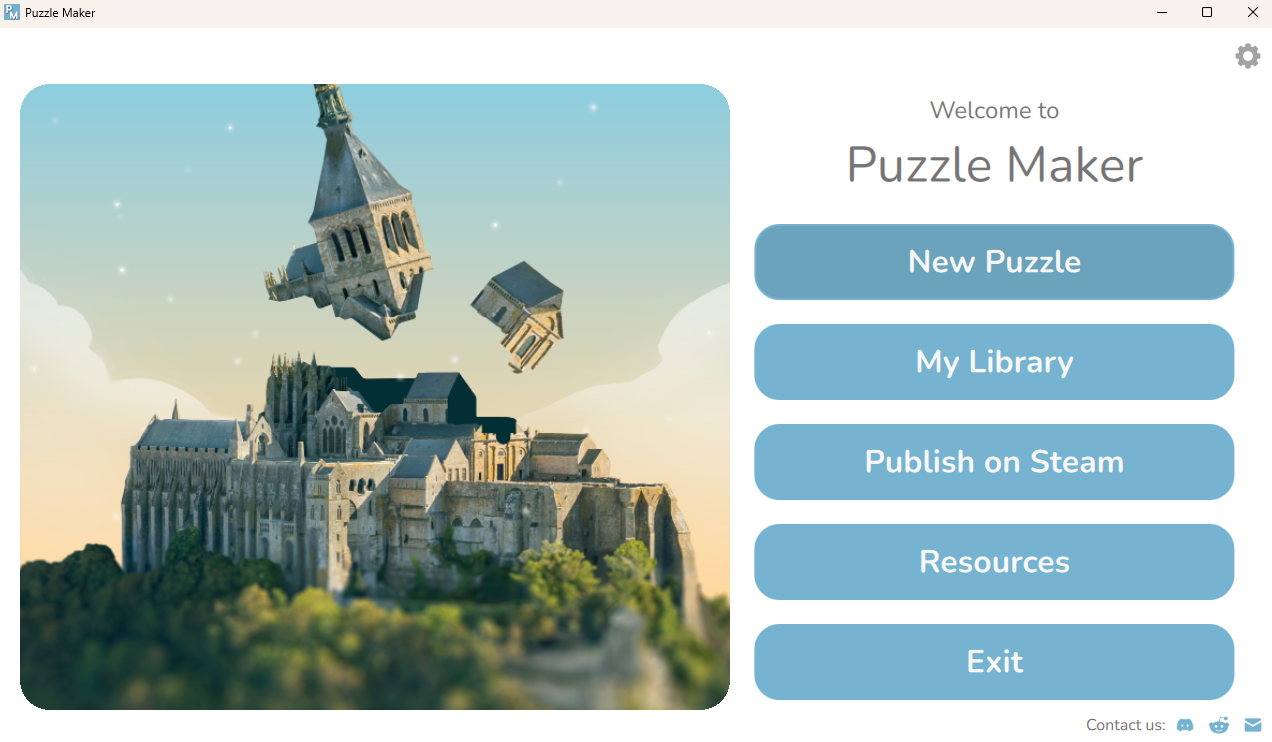
First click 'New Puzzle'
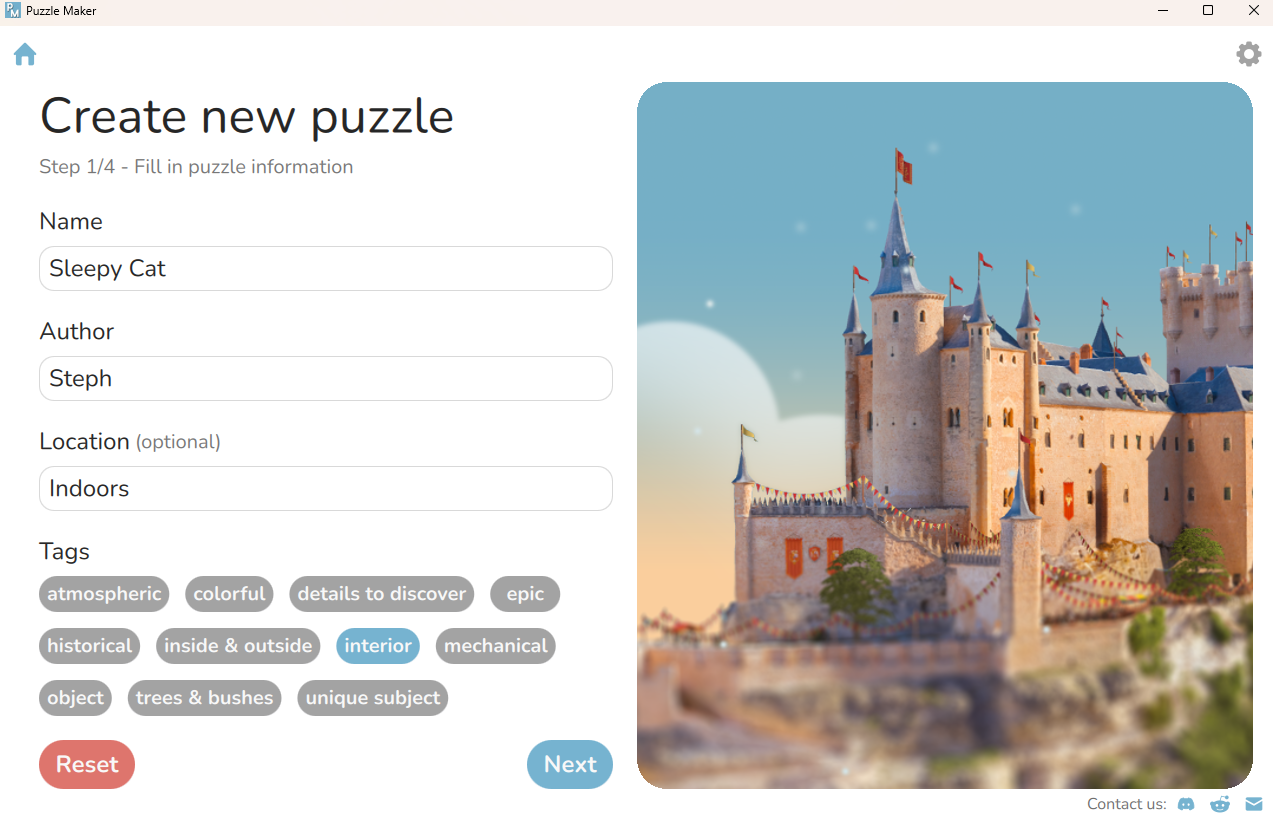
Insert your puzzle details then click 'Next'.
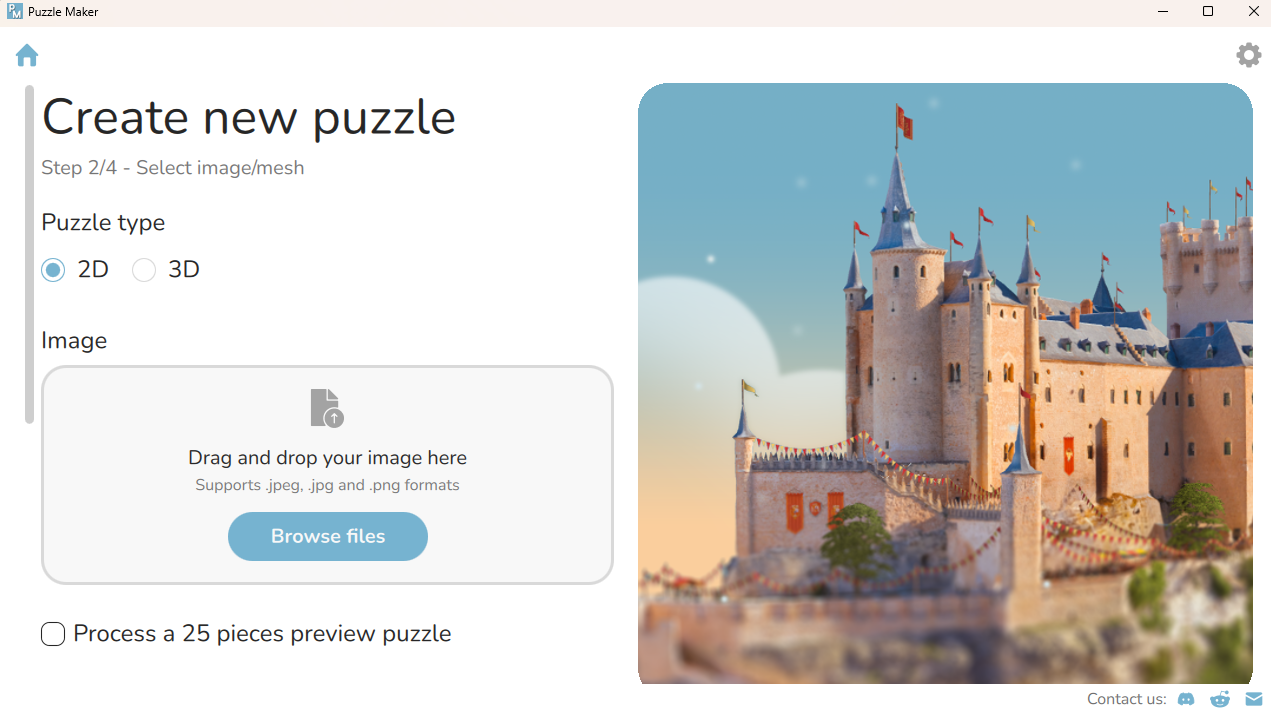
Make sure you click '2D' and then either browse for, or drag and drop your image you want to make into a puzzle.
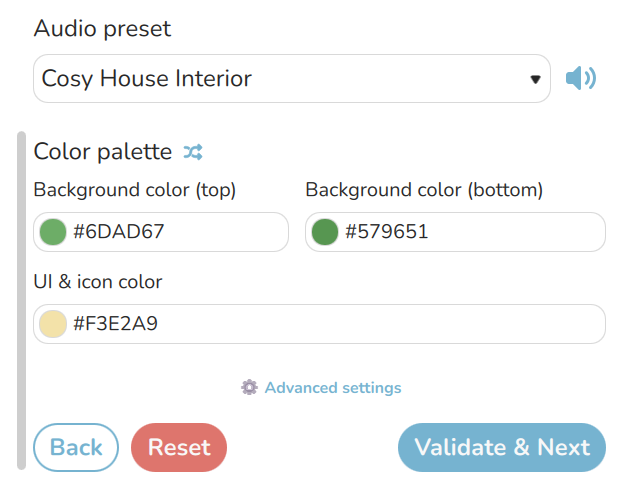
Scroll down and choose a soundscape and colours (optional), then click 'Validate & Next'
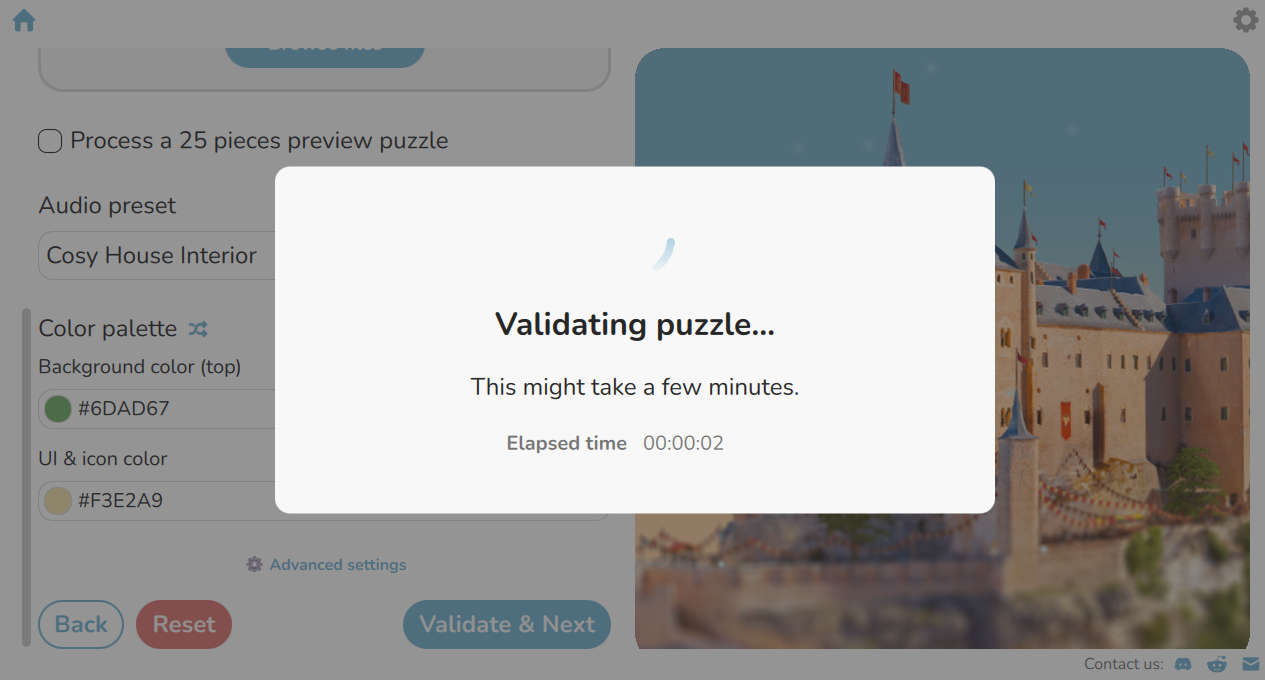
The puzzle make take a moment to validate:
Once your puzzle has validated, click 'Next'
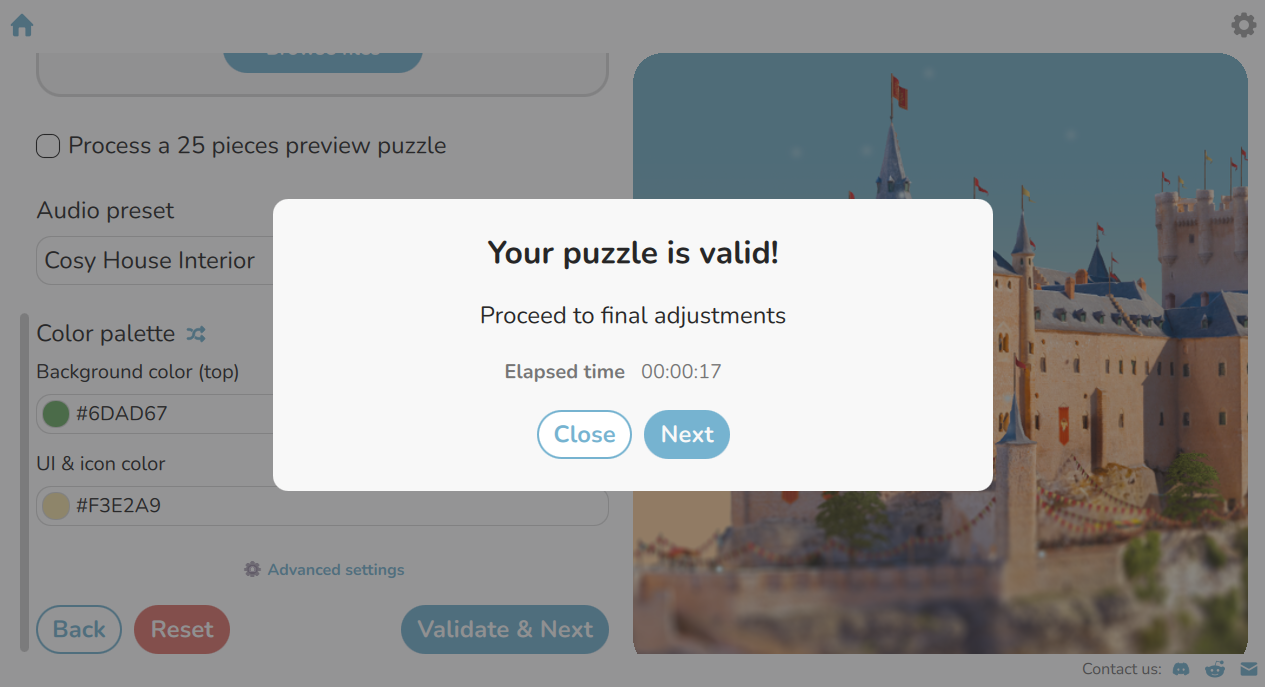
You can now choose and adjust your thumbnail
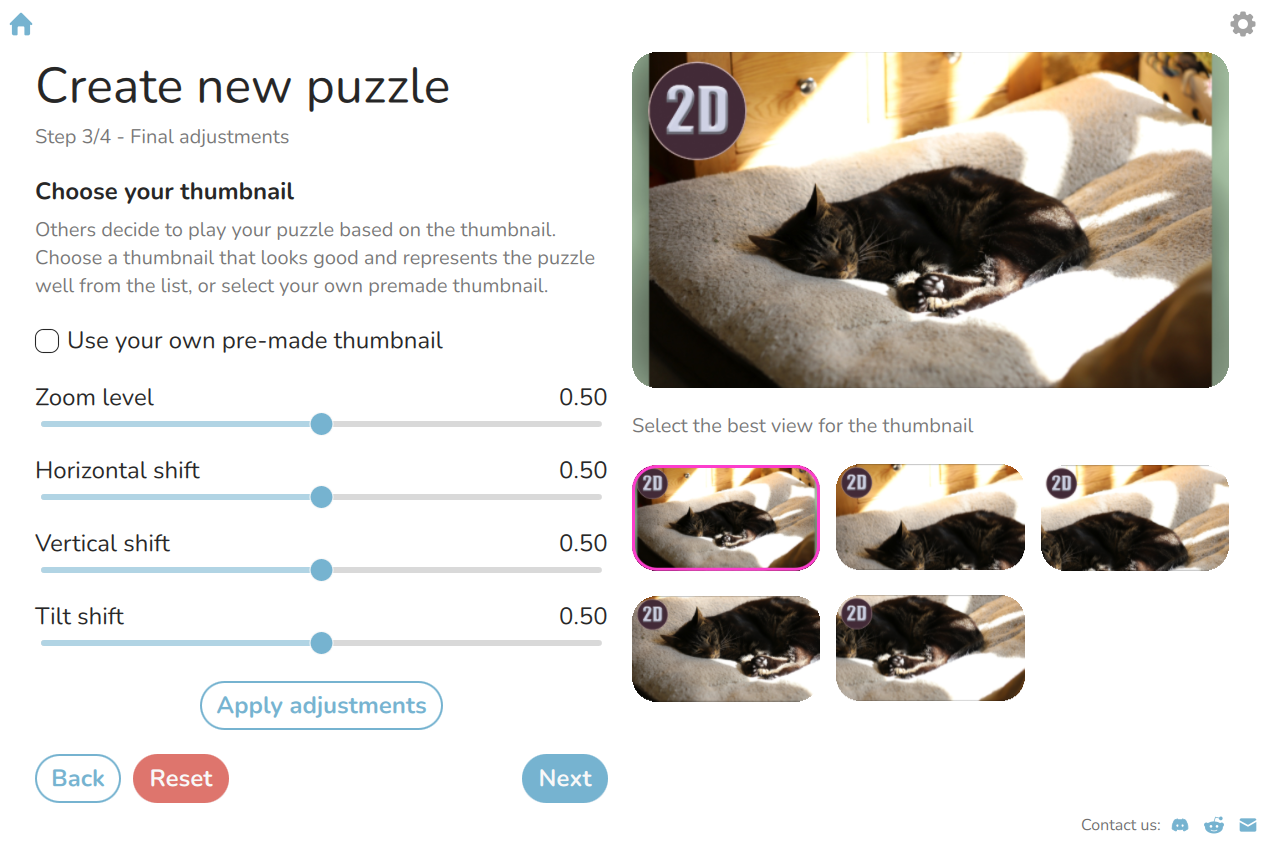
Once done, click 'next'. On the next screen, scroll down and check all the details are correct, then click ' confirm & Launch'
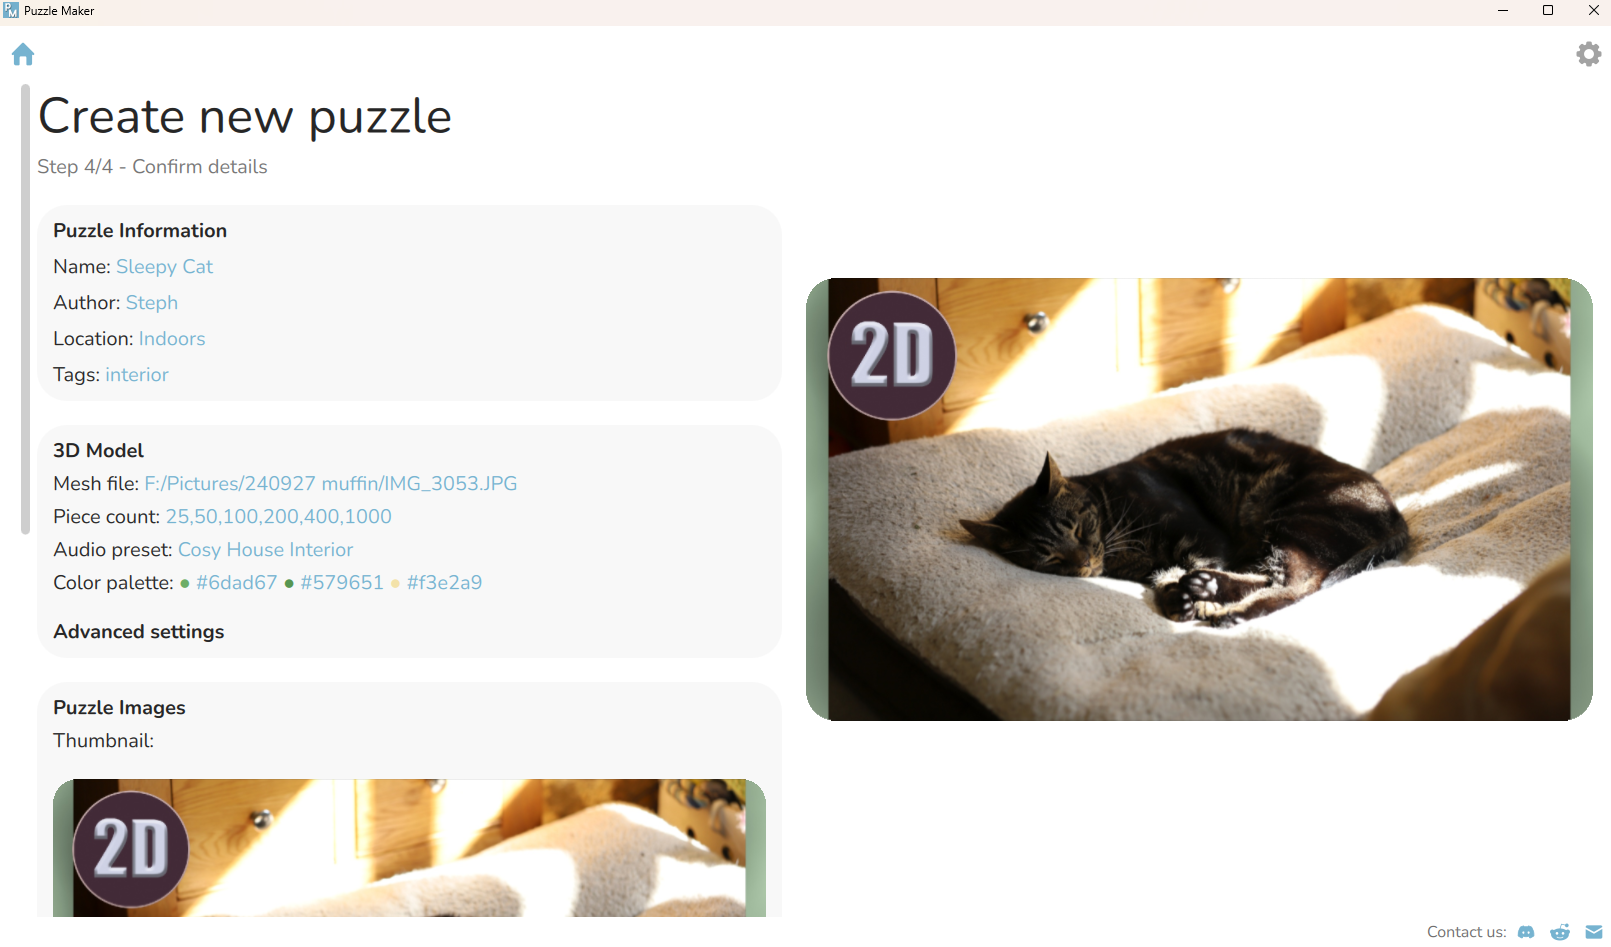
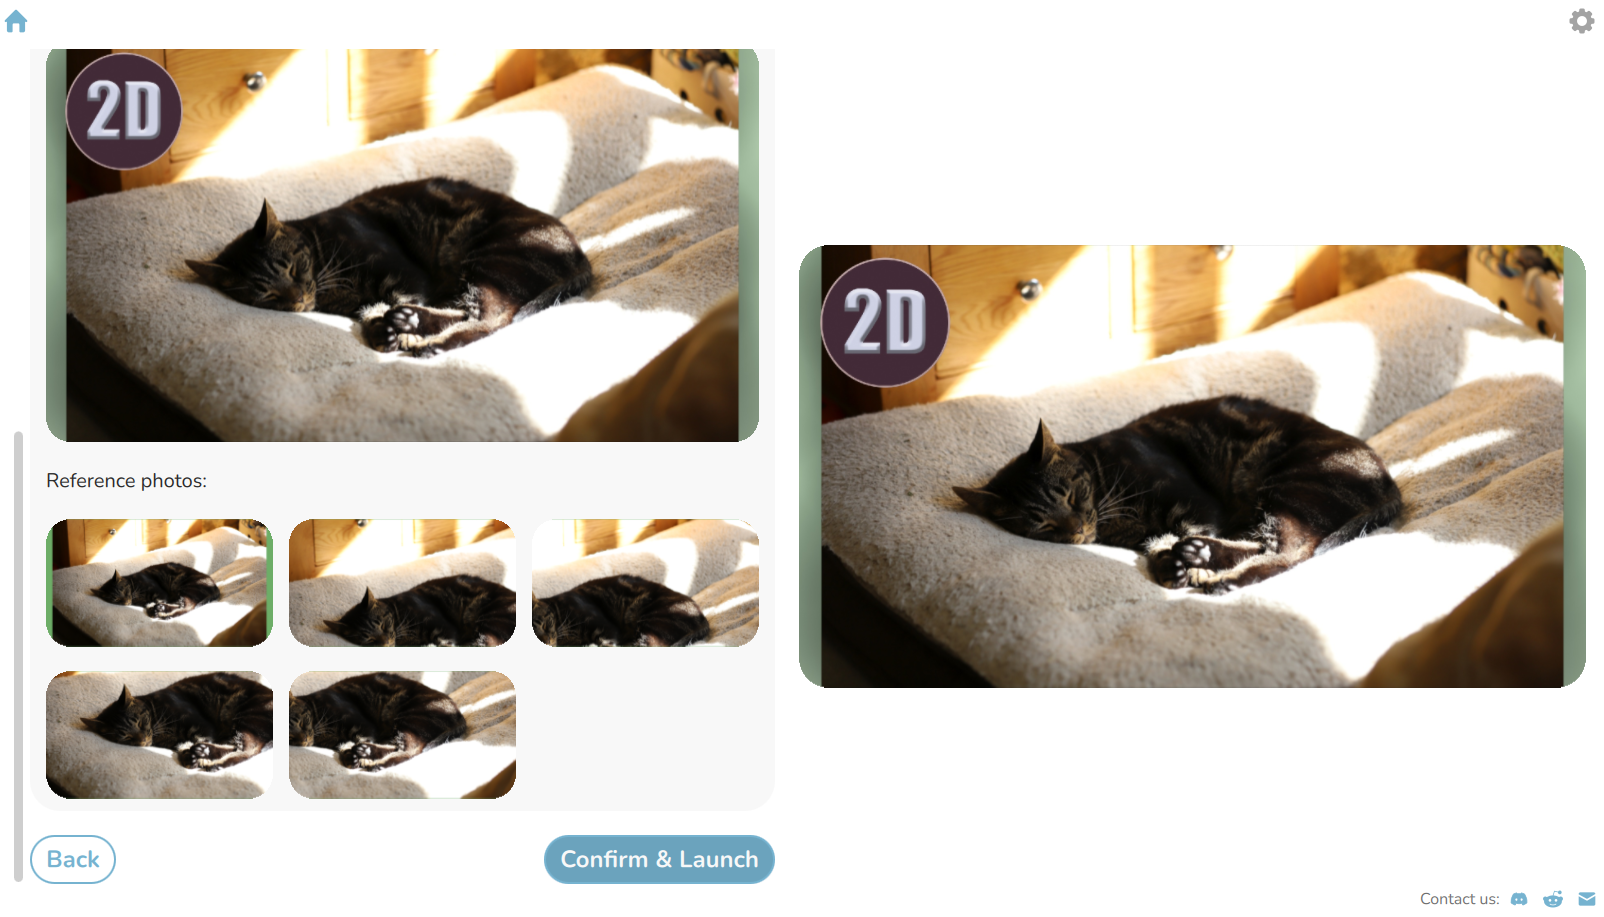
Now, your puzzle will begin processing. This can take several minutes.
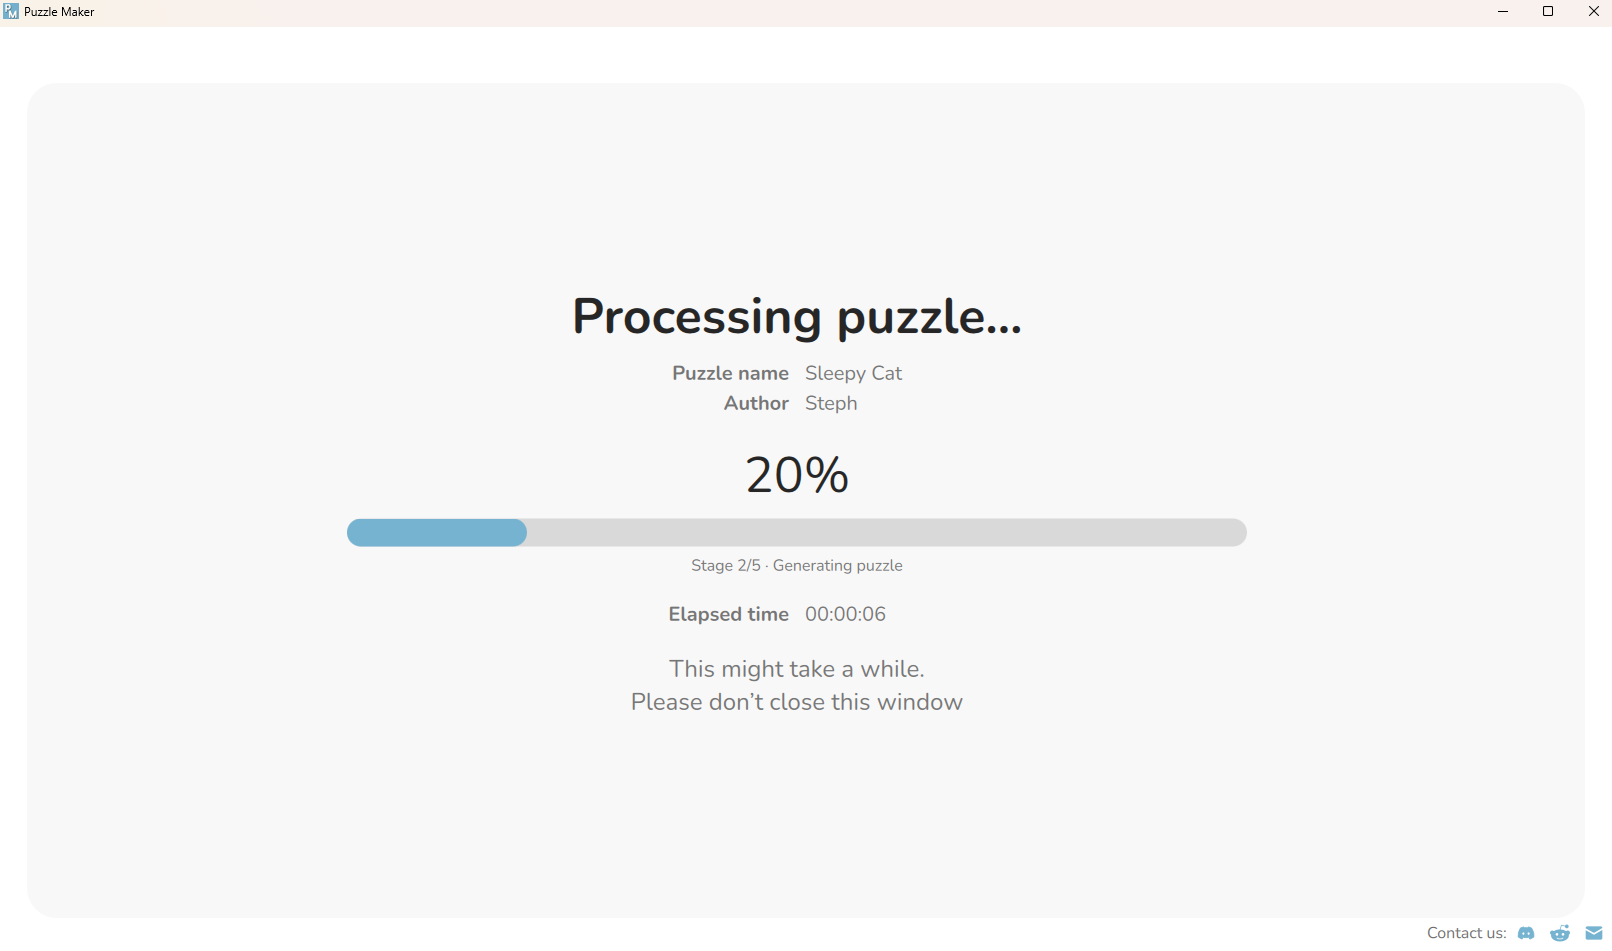
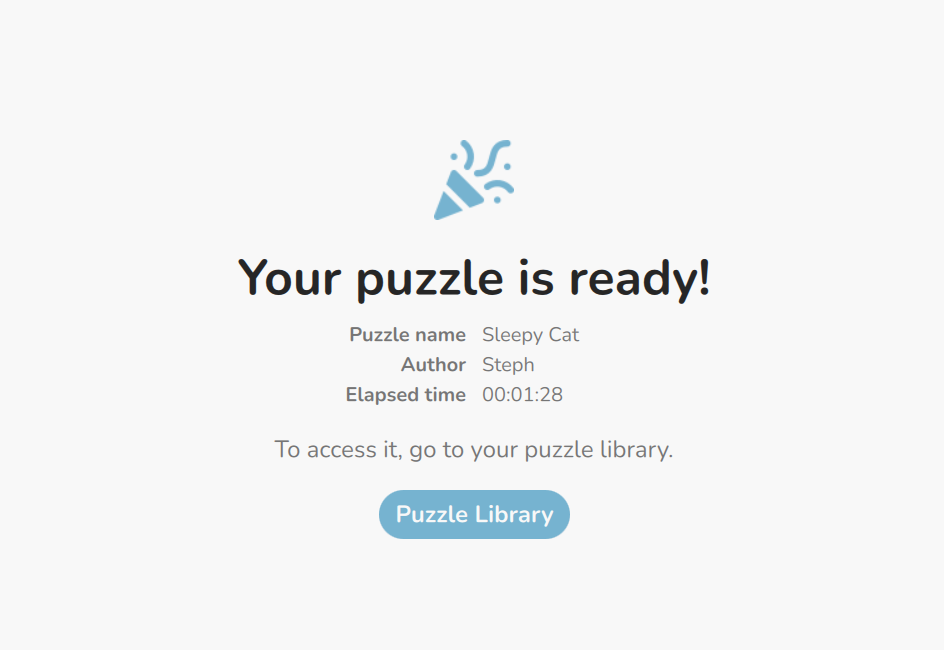
Once completed, click 'Puzzle library' to see your finished puzzle.
Publishing to Steam Workshop
From your Puzzlemaker library, click on the image of the puzzle you’d like to publish to the Steam Workshop.
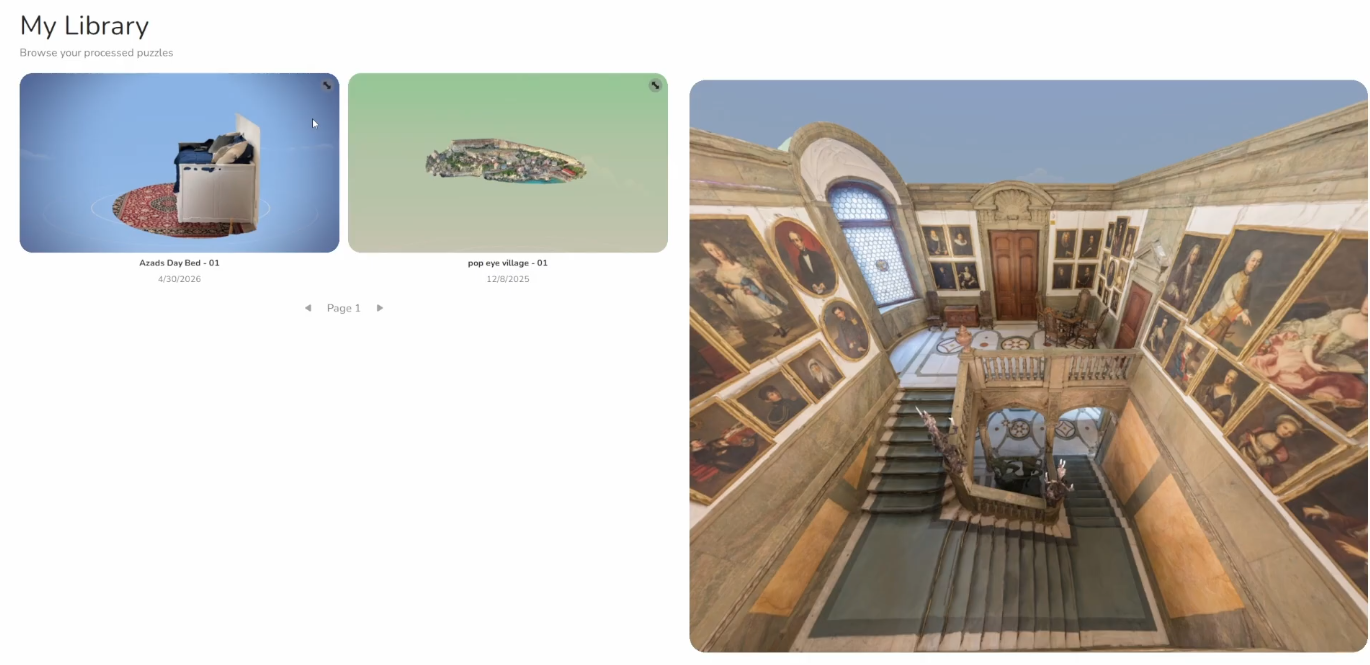
Scroll down to the bottom of the page, and click ‘Publish to Steam Workshop’.
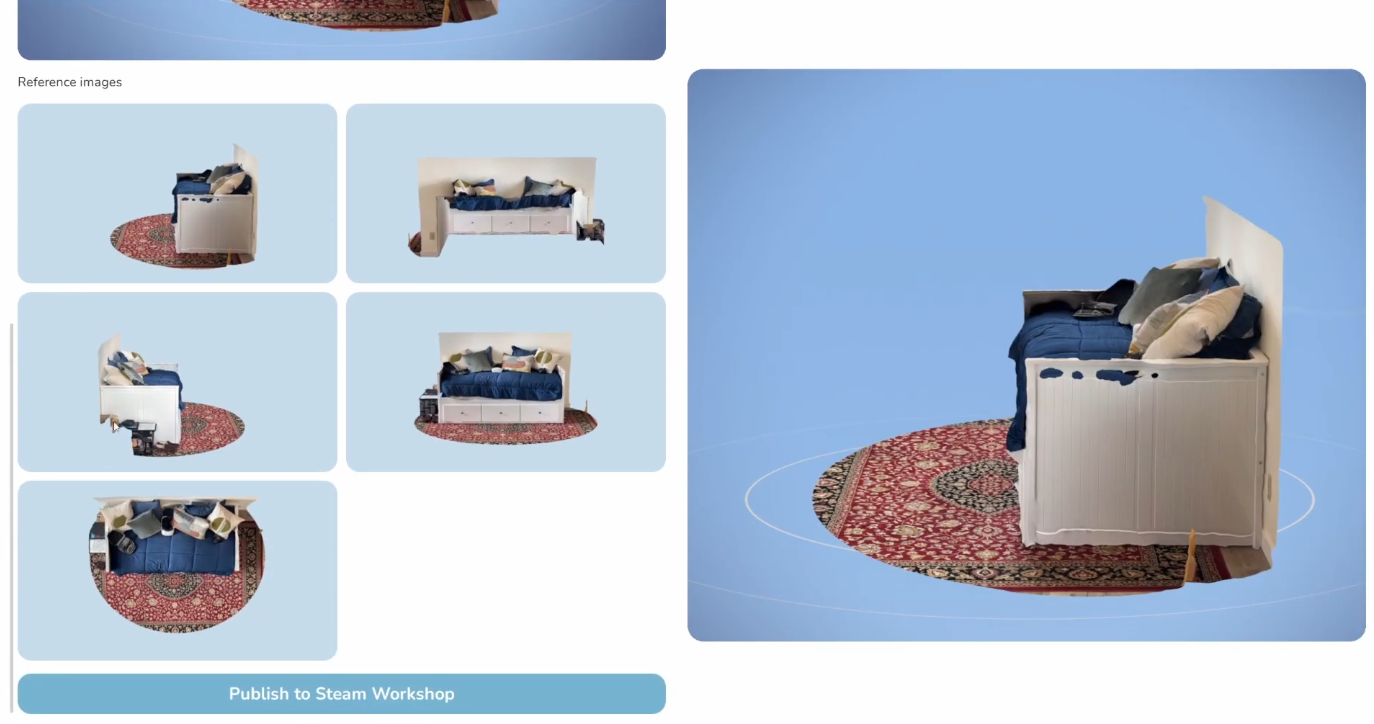
From here, you can update your puzzle’s title, description, preview image, visibility & Metadata. This section should be pre-populated based on the information provided earlier.
When publishing your Puzzle to the Steam Workshop, you have a few visibility options:
- Public - The puzzle will be publicly visible and anyone can download it
- Friends Only - The puzzle is only visible to people on your Steam friends list
- Unlisted - The puzzle is hidden from public searches, but can be shared with others
- Private - The puzzle is only visible to you
Once you are ready, click ‘Next’.
Review the options on the next page, then click ‘Publish’ (This may take a few minutes). Once it is completed, a green banner reading “Your Puzzle is Published” will appear.

Playing your Puzzle
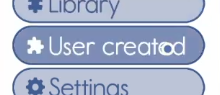
Next, open the game. Go to the User Created tab and click the Browse button in the top right. After a couple of minutes, refresh the library view and you will see your puzzle, ready to play.
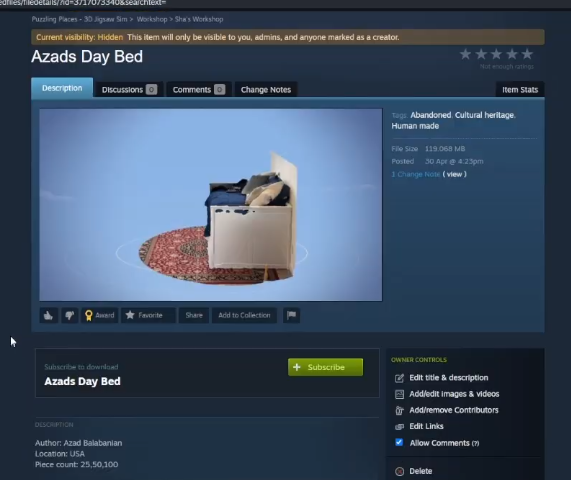
Search for the puzzle you published to Steam Workshop. Once you find it, subscribe to the item and return to the game. Steam will download the puzzle automatically after you subscribe, but this can take a few minutes.
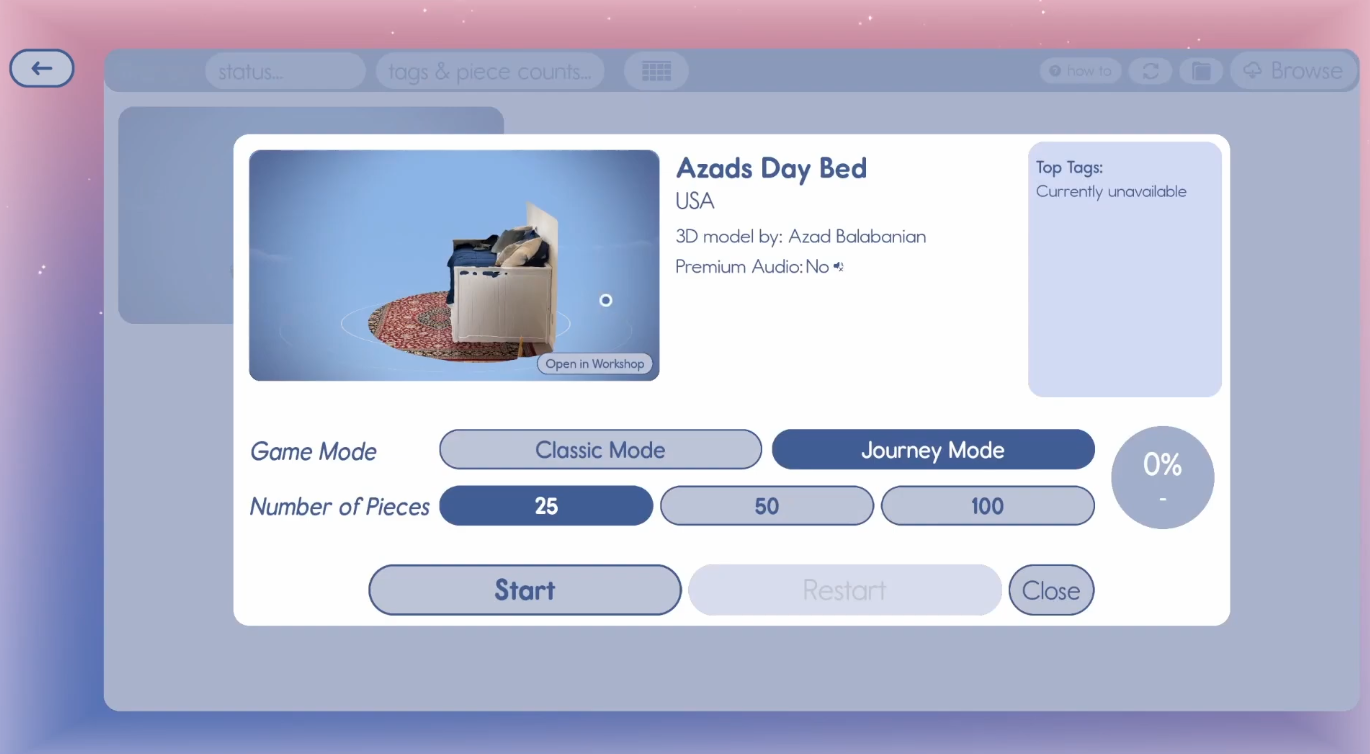
Click on your puzzle, choose a Game Mode & Piece Count & Start puzzling!
Playing puzzles from the Steam Workshop
Puzzles made with Puzzle Maker can be shared with other players through various ways. Players can either upload to Steam workshop or directly send eachother the .puzzle file generated by puzzle maker!
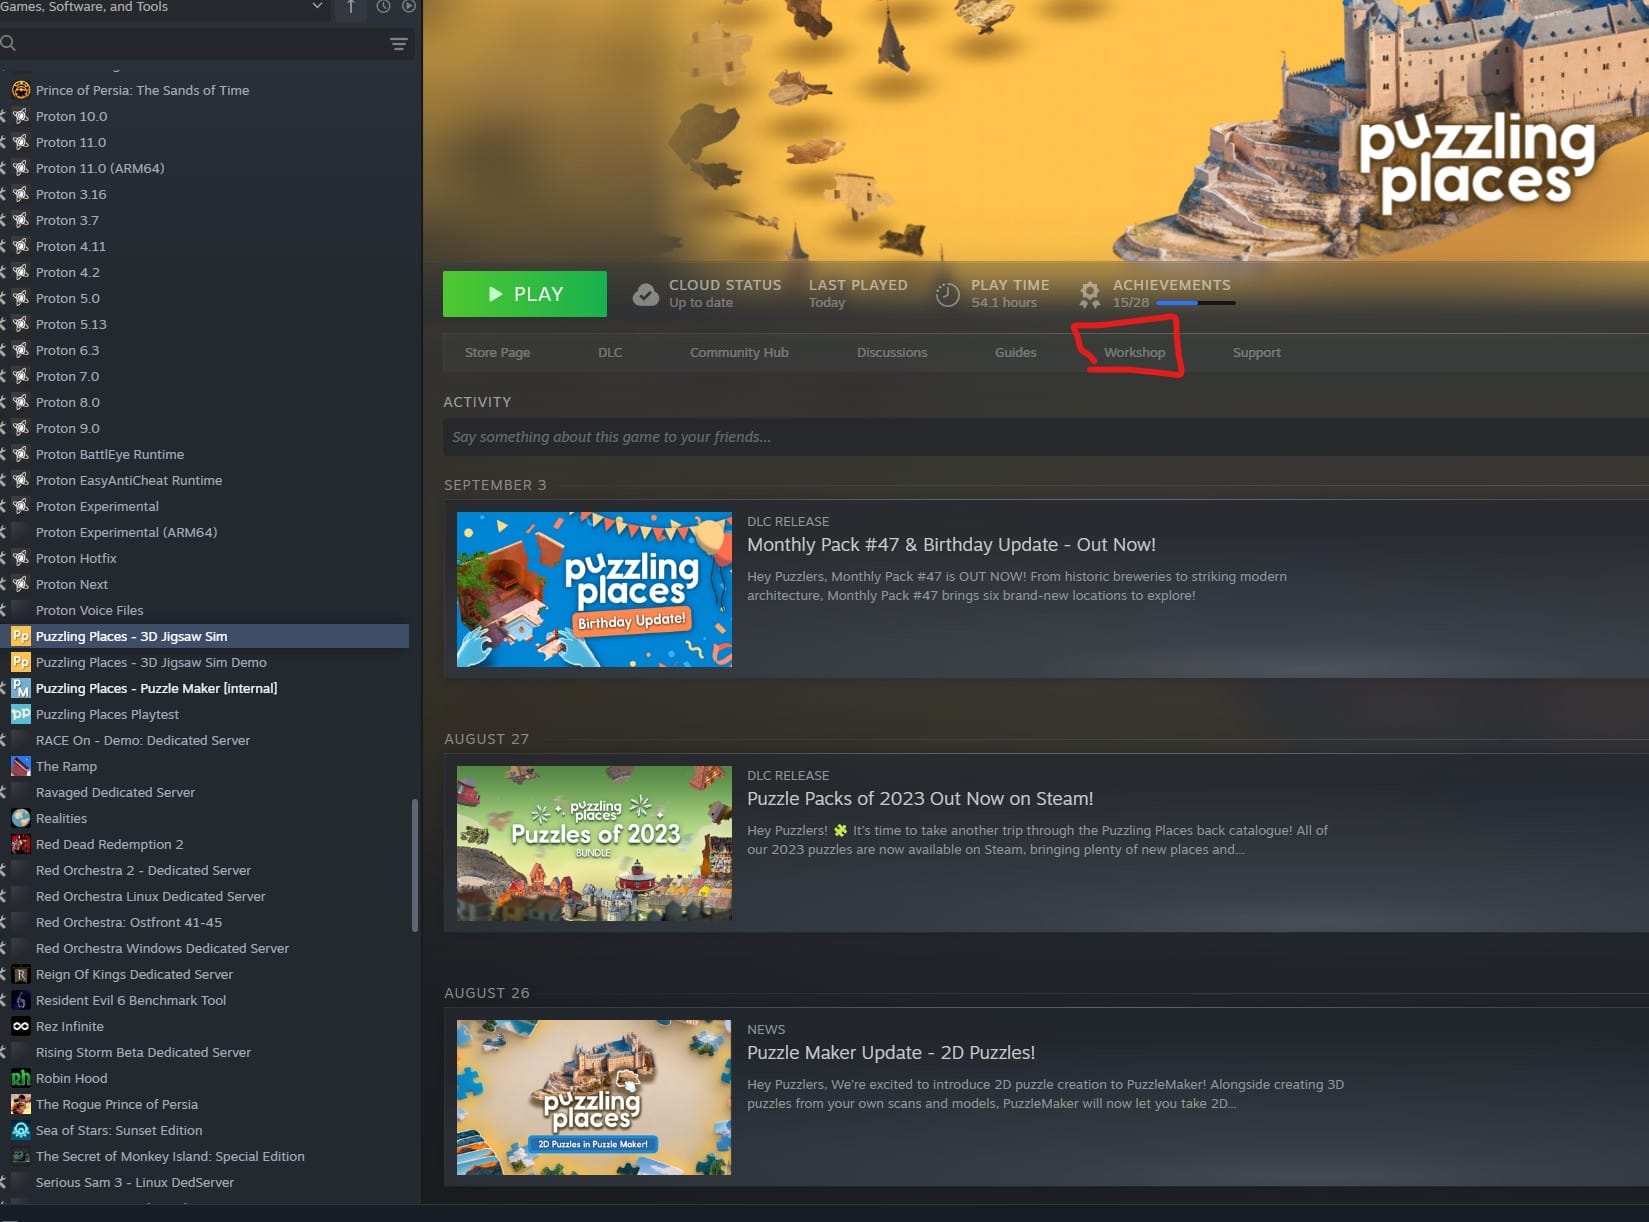
The typical way is to play through Steam workshop. In your library click on Puzzling Places and navigate to workshop:
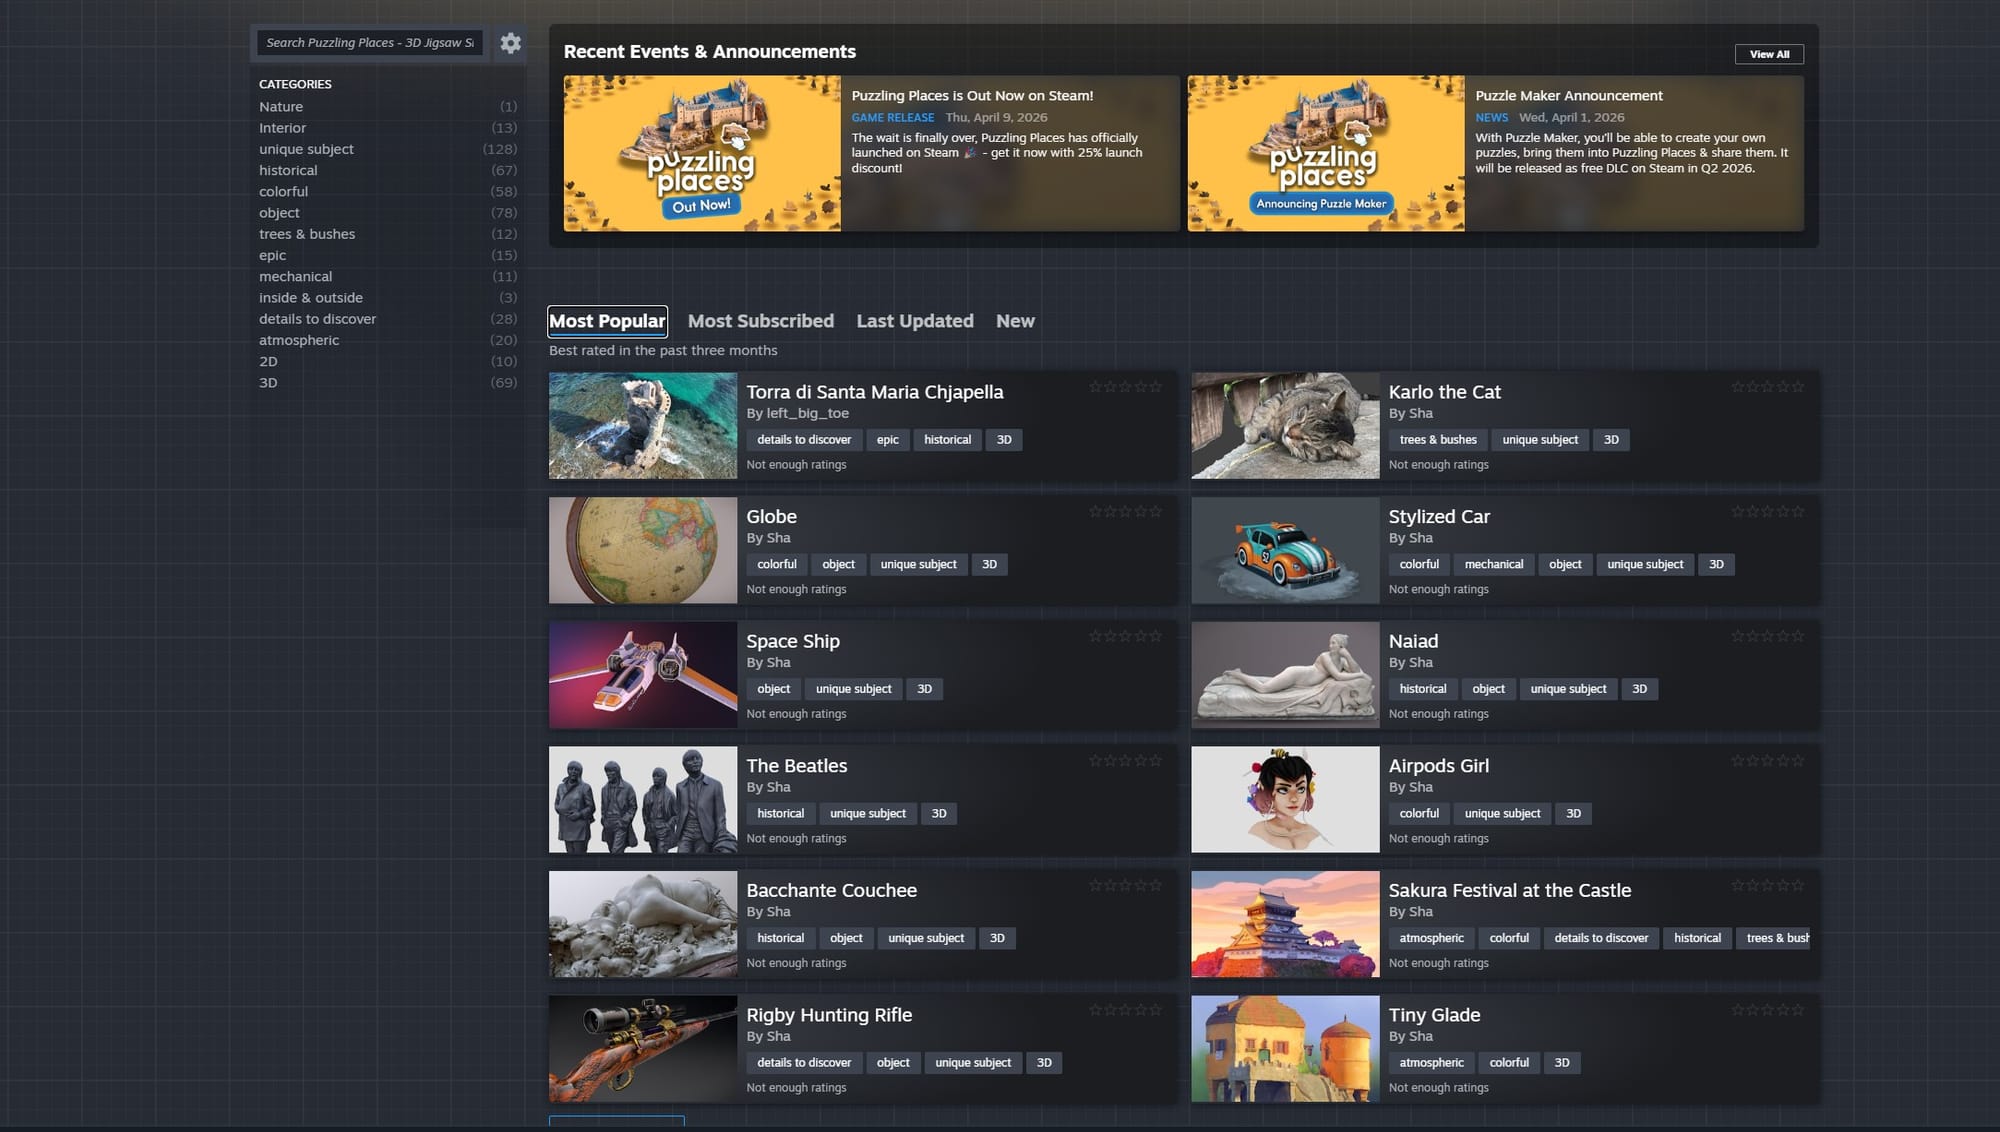
Navigate to any puzzle you like, click on the thumbnail.
This will show you information about the puzzle. Here you could find also more images from different angles to help you decide wether you want to play this puzzle or not! Once decided, click on Subscribe.
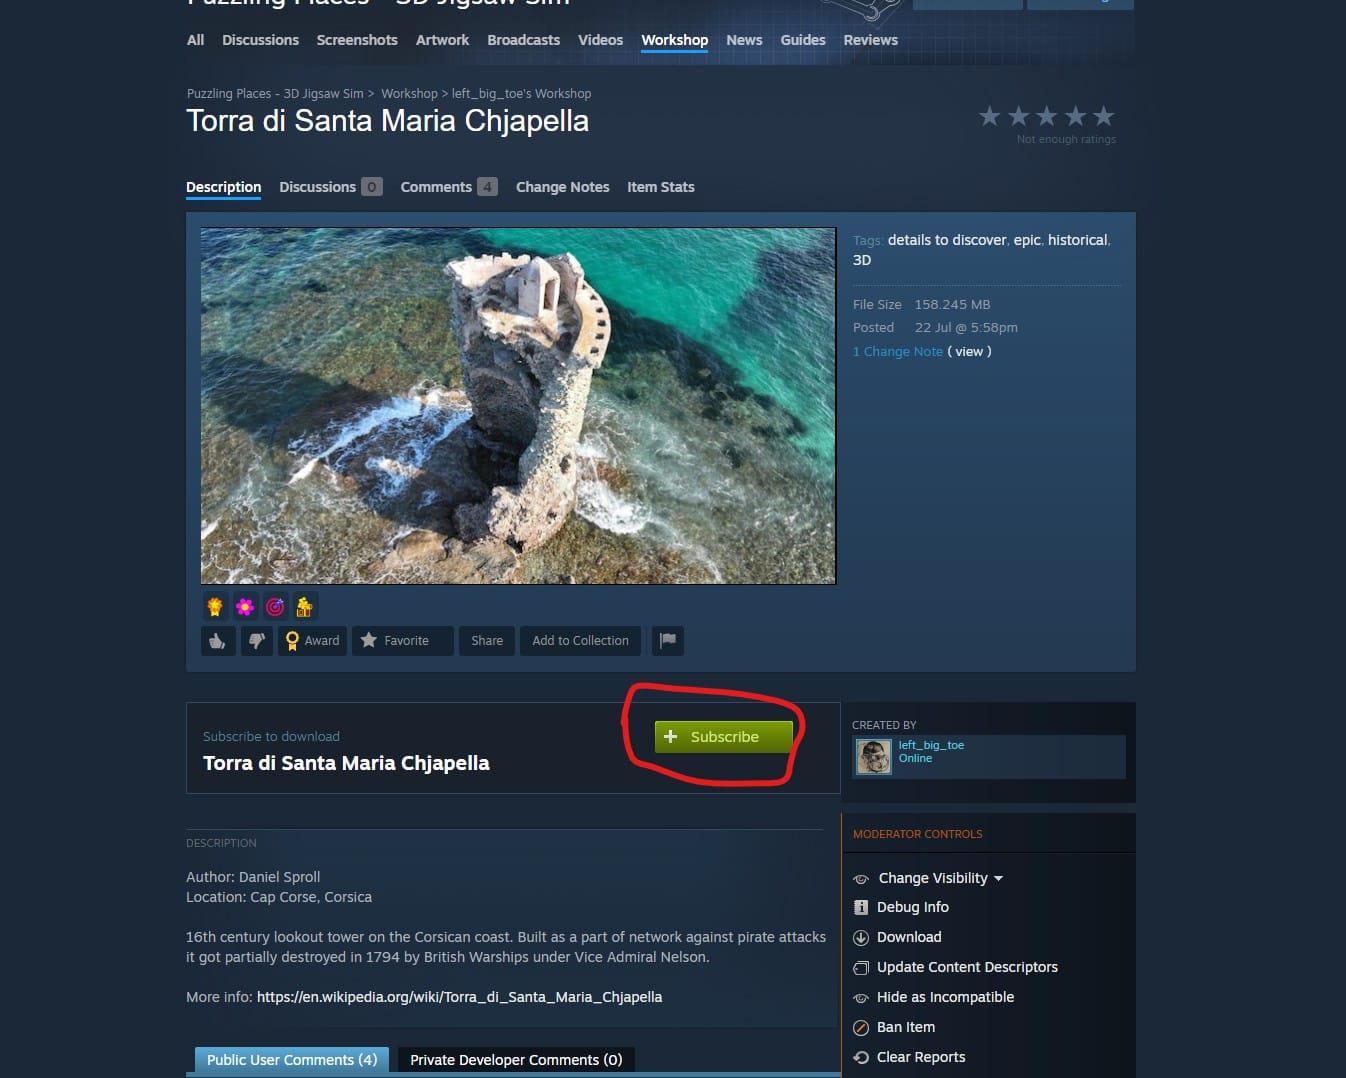
This will start the download of that puzzle. Steam will automatically place the puzzle in the right spot. Once you have downloaded the puzzle, start the game. In the game navigate to workshop tab, and your puzzle will be in there.
You can also access the workshop from within the game. Navigate to Workshop tab, click on How To on the top righ and click on Browse. This will open the steam overlay, bringing you to the same page.
Important Notes
2D Puzzles: Some puzzles are normal 2D jigsaw puzzles. These have been tagged as 2D both in Steams tag system as well as visually on the thumbnail. In case you don’t want to play 2D puzzles, you can use steams tag system to filter them out. All new 3D puzzles have 3D tag and 2D puzzles tag 2D. Since some of the earlier 3D puzzles are not tagged as 3D, the best method would be to exclude 2D tags from the filter of steam workshop. this will give you all the 3D puzzles.
Limit on number of UGC downloaded: Every user generated puzzle downloaded and subscribed to, eats in a bit of your PCs memory, so that it can be displayed in the menu. If you have all our puzzles and hunderds of UGC puzzles, this can lead to visual artifacts as the engine struggles to load all the images it needs in to the memory on time. Try to keep the number of workshop puzzles downloaded under that thershold.
Platforms: User generated puzzles only work in Steam at the moment.
Tips, Tricks and Questions
Are there alternatives to Scaniverse?
es! Although we do not have detailed instructions on how to use other apps, you can find a full list of 3D scanning apps here
My 3D scan looks blurry or distorted, what did I do wrong?
You may have moved too quickly during scanning, or the item may have been moved. Try moving your camera more slowly in sweeping motions.
I can’t find Puzzlemaker on my Steam Account
By default, Steam will not show Tools in the Library page. on the Library page, click the ‘Games’ drop down and click on the checkbox next to ‘Tools’. Alternatively, you can search for Puzzlemaker using the search function on the left hand panel of your Steam Library.
Puzzlemaker is ‘Missing/Invalid PortableBlender DLC’, how do I fix it?
If Puzzlemaker is missing Portable Blender, you can resolve this by following this guide: https://puzzlingplaces.notion.site/Fixing-Missing-Requirment-Error-35a5bb463a218022a6e8cd4ef273e229?pvs=74
I can’t find my puzzle in the Steam Workshop!
If you can’t find your puzzle in the Steam workshop, this may be because of your privacy settings.
An easy way to find your puzzles is by going to your own Steam profile, and clicking ‘Workshop Items’ on the right hand panel. From there, you should see a list of all the workshop items you have created on Steam.
Further Documentation and Advanced Tools
Have a question? Want to know more about puzzlemaker? Want to know what else you can do with Puzzle Maker Tools? Check out our full puzzlemaker wiki here!
Update History
Keep an eye on all updates and DLCs at Puzzling Places. Don't miss out on future releases and Dev Chats by subscribing to our mailing list!
Follow us
You can also join our communities or follow us to get the latest news about future puzzle packs and other exciting updates:
Happy puzzling!
-realities.io team